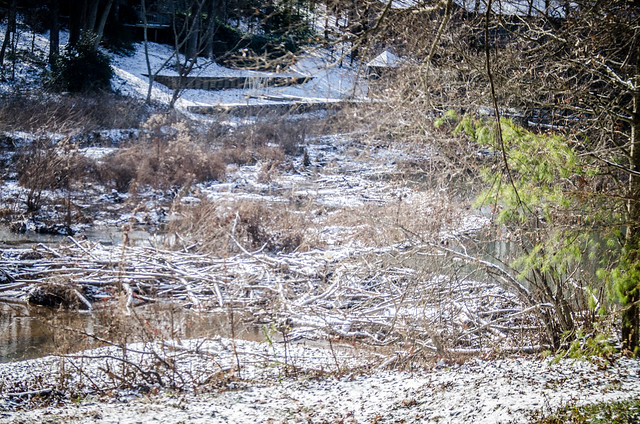
We have a very active family of beavers in our back yard. They have managed to dam almost our entire little lake (or the streams that run through what used to be a lake.) While I personally like the beavers, and enjoy seeing the lake much fuller just upstream, their activity is flooding some of my neighbor’s yards. One of my neighbors will occasionally disrupt the dam and let the water flow through. But, the beavers build it right back. It’s a never-ending battle.
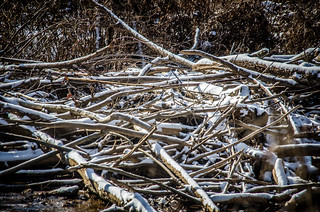
On Saturday I looked out the back window to see the water flowing again. With all of the melting snow, I guess there was the danger of more flooding, so my neighbor broke through the dam once again. I knew it wouldn’t last, that the beavers would rebuild quickly. I figured this might be a good time to try out my long-term time lapse rig with the Raspberry Pi.
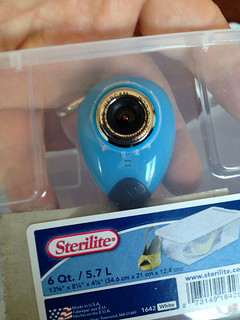
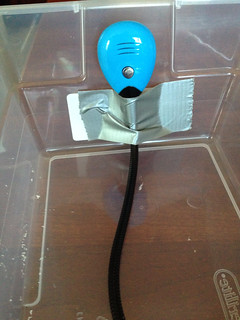
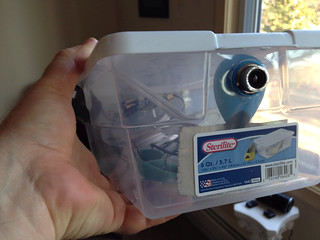
Before the snow I had purchased a cheap plastic box with a lid to serve as a weatherproof housing. I also bought a simple extension cord so that I could provide power to the unit. I happened to have a round keyhole bit for my drill that was the same size as the camera lens on my HUE webcam. I drilled a hole in the plastic box and fitted the camera, securing it with duct tape.
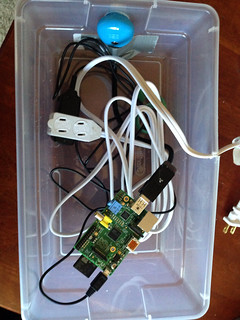
I placed the RPi inside and attached an old phone charger with an AC plug as power supply.
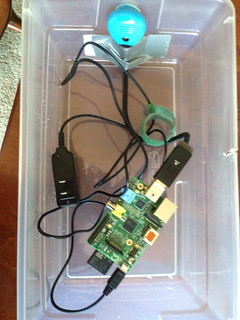
I then plugged that into the extension cord, which I ran through a slot I had cut into the plastic box. The original idea was that I would permanently fix the extension cord using some sort of sealant. That way I could simply plug in the RPi without having to leave my power cord with the box. The method would be OK for a proof of concept.
I put the lid on and secured it with more duct tape, just to be safe.

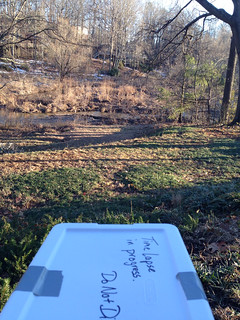
I took my time lapse box out to the back yard and placed it so that it had a view of the dam. I then ran one of my long power cords out to the box and attached it so that it would have constant AC power. My only concern at this point was whether or not the RPi was too far away to reach my WiFi.

Success! When powered up the unit did hit the WiFi, and I could connect through VPN. Since I had configured the Motion software in daemon mode, it started up as soon as I had provided power, and was already recording interval images. That meant that if I lost power, this thing would come back on and continue recording using whatever parameters I had set in the motion.conf file.
The first image was totally washed out, and I was worried that this might not work at all. The second image was OK, but it’s still not quite as sharp as I would like. I know the HUE is capable of HD imagery, but for some reason I can only get 640X480 images. There must be a setting somewhere I’m missing. I really don’t want to invest in another webcam (especially since this one was free.)
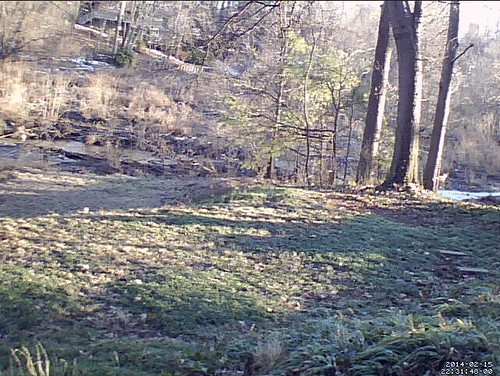
Using my reference image I was able to go out and adjust the angle, etc. I’d really like to have it closer to the lake, but I’m worried about the WiFi range. I’ve got a WiFi extender I could use, but that seems a bit extreme for this project.
At first I set the RPi so that it was taking one image every 30 minutes. That’s a MUCH longer interval than I’ve ever used before. However, I got to thinking about it and doing the math. At that rate I would generate only 48 images per day. Let’s toss out about a third of those because they would be at night and too dark to see anything, and you’re getting about 36 images per day. To get just 10 seconds of video at 30 fps you would need 300 images. That means I’d need to leave this thing running for nine days just to get 10 seconds worth.
I decided to bump up the interval rate. At one image every 10 minutes I would be generating 144 images per day, or about 96 useable images. It would only take a little more than 3 days to generate 10 seconds worth of video. I ultimately decided on one image every 5 minutes.
The beauty of this rig is that as long as it can attach to my WiFi, I can control all of these parameters remotely. The thing sets itself up as a mini web server, so all I need to do is open a browser to preview the images. I can even change parameters through the browser without using VPN. I can even do this through my phone, if I wish.
I don’t really have to worry about running out of space on the RPi. At 640X480 the images are small, and I’ve got a 16 GB SD card. Even if I were worried about space, I could simply use FTP to transfer the collected images remotely from the unit to my laptop, clear off the space, and start all over without missing a beat.
So, let’s say I DO get out of range of my WiFi. As long as I’ve got the parameters set up ahead of time I’m OK. I just can’t remotely monitor anything. I would have to set it up, let it run, and hope everything came out OK.
It doesn’t matter if you’re using an inexpensive RPi rig like mine or a DSLR with a dolly system, taking long-term time lapse is a gamble. Even with the ability to closely monitor what’s going on, you can’t predict what will happen over your time frame. All you can do is hope to capture what you intended at the end of your session.
So, I’ve got the unit up and running. I’m going to leave it there and hope that the beavers are active over the next several days and that you can see the dam being built and the water levels rising. Whether I succeed or fail, I’ll post a follow-up when I’m done.