
In the first part of this series I was stumped because I didn’t even have a pair of 3D glasses. This time I was stumped because I didn’t have a 3D camera set-up. In Part 2 I had mastered converting existing sterographic images into 3D anaglyphs using Photoshop, and now I wanted to try my own shots. It was a challenge.
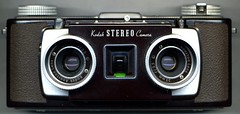
Twin lens stereoscopic cameras have obviously been around since at least the mid-1800s, and film versions continued in production until the late 20th century. Viewmaster even made 3D cameras for consumers at one time, in addition to their popular 3D viewers.
With the latest craze in 3D movies and television, 3D cameras are making a comeback. Fujifilm’s Model 3D W1 shoots stills and video in 3D. I think Panasonic also makes a 3D camera.

There are also rigs that allow for stereoscopic photograph. Some of these include twin camera setups, and some simply allow the camera to slide along a rail to change position.
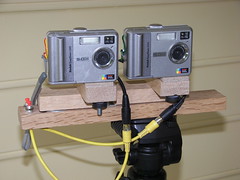
But, I had none of that, and I didn’t really want to go through the hassle of building something for an experiment. What I did instead was to take my little Nikon S70 point and shoot and try a couple of hand held shots. I would take one shot, then move the camera to the left about 4 inches and shoot again, trying to maintain the same orientation, etc. It wasn’t foolproof, and I knew there might be some errors, but it was close enough for a proof of concept.
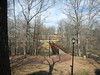
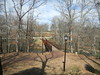
I was anxious to get started, so after work I headed out to get some shots. I started with our own office, and was able to produce some anaglyphs of scenes around here.
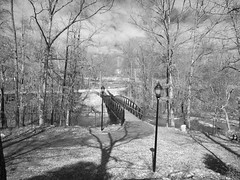
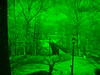
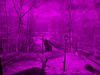
I made some discoveries along the way. First, composition is important. The best anaglyphs include something in the foreground as well as an interesting background. For example, this image of the Middle Tyger Library works well because of the bench in the foreground.
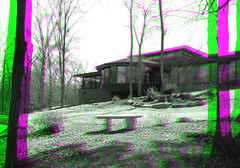
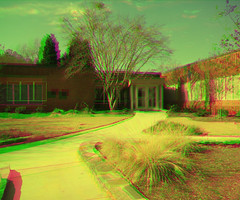
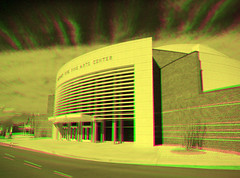
Since I don’t have high-end 3D equipment, I found that monochrome works much better than color. Colors are going to get distorted when I start monkeying around with the color levels, anyway. Best to discard distractions. The image of Middle Tyger Library above was converted to black and white before changing the levels. Here is one of the district’s Fine Arts Center using images that had first been converted to high-contrast black and white images.
When I got home I also had to adjust my Photoshop workflow a bit. The original tutorial made a big point about not confusing the right and left images. They even suggested keeping separate folders for each eye. I can understand why. It’s very easy to confuse which is left and which is right when the source images are so similar.
One solution I found was to go ahead and change the color levels of the images before pasting them into the composite image. These were the steps I took…
1. Open each photo individually.
2. Convert the photos to black and white. Make sure that you use the same process for each image. In CS5 I used the neutral density B&W preset.
3. Go ahead and change the color levels on the individual images – green for left and magenta for right.
4. Create a new image. Copy and paste both of the original images, now color-adjusted, into the new one.
5. Set the blend mode of the upper layer to Screen, and move the upper layer until aligns with that focal “sweet spot” where the images appear to align. At this point, you’re done! Just crop as needed, and save.

Obviously I would have gotten better results if I had some way to precisely align the camera as I was shooting the photos. However, this wasn’t too bad for being handheld. I had to wait for traffic to clear so that I got identical shots for right and left. I also imagine you couldn’t shoot anything moving with this process.
The process worked well enough for a proof of concept. I was able to see some 3D effects on the photos. These looked much better on my Mac at home than on my smaller laptop – the larger images did better justice to the 3D. Still I consider my first foray into 3D photography a success.
For the final part in the series, I’ll explore ways of turning existing 2D photos into “fake” anaglyphs.