
In the previous parts of this series I looked at ways of creating anaglyphs with Photoshop, both from old stereoscopic images and from a set of two images shot with a hand held camera. But what if you’ve already got a photograph and want to “fake” a 3D image? Well, I think I’ve worked out a method of doing that, too.
So far I haven’t found any tutorials online for creating fake anaglyphs in Photoshop. I did find Jim Long, who has done an excellent job of converting 2D images into 3D cyan-red anaglyphs. Jim as quite the gallery not just photographs, but also of classical art rendered both as stereoscopic images and as anaglyphs. Here’s his version of Da Vinci’s Mona Lisa:

I don’t know what process Jim is using, but he manages to maintain color on the images very well. He also has a link to a supplier of 3D glasses with one of the most extensive inventories I’ve seen.
So, still without a tutorial, I had to see what I could figure out for myself. I started by looking through my collection to see what photographs would be good candidates for this process.
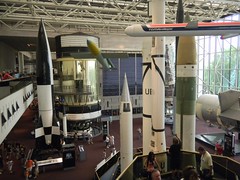
As mentioned in Part 3 of this series, composition is important. The best candidate images already have some depth to them – they are not flat. It helps if there are points of interest in the foreground as well as the background. I started with some photos from a trip to Washington D. C., with photos of the Lincoln Memorial and the Smithsonian’s Air and Space Museum.
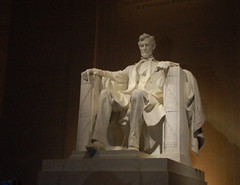
Starting with the Lincoln statue, I opened the image in Photoshop, then rendered it in black and white. I then made a copy of the base layer so I had two copies of the same image. One would be for the right eye and one for the left.
The next step was to figure out how to offset the images correctly. Human binocular vision is offset by about 6 degrees, but our eyes render a single image with a definite focal point. I didn’t think I could just slide one layer off a bit and have it work. (In fairness, I didn’t try it. It MIGHT work.) Instead I decided to add change the perspective slightly on each layer.
I decided that the base image would be the left eye image. I did a CTRL-A to select the entire layer, then went to Edit, Transform, and selected Perspective. I pulled the left corner up until it was about 110% of the original. I repeated the process with the upper layer, but this time pulling the right corner up the same amount. That gave me two slightly different images with different perspectives.
The next steps are similar to those described in Part 2 of this series. I changed the blend mode of the upper layer to Screen, then positioned the upper layer so that it aligned with the sweet spot of the focal point. Finally, I changed the color levels on the layers to magenta and green, then cropped as needed. Here’s the result:
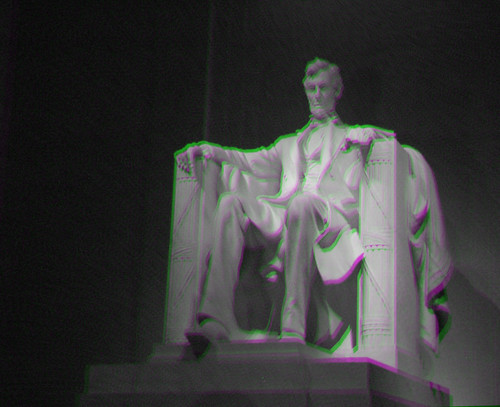
I think if I had used a photo shot more from the corner, the effect might be a bit more dramatic.
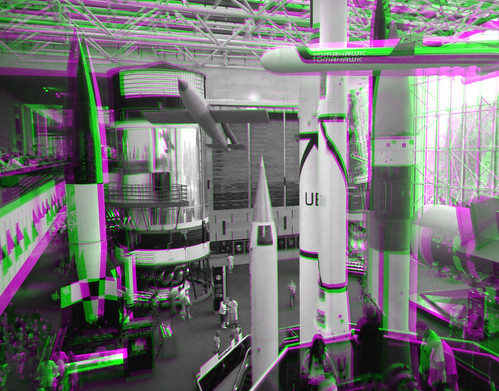
I did the exact same thing with the photo from the Air and Space Museum. To me, this turned out better because there were rockets in the foreground to provide greater 3D effect.
The best fake anaglyph I’ve created so far, though, already had lots of 3D elements to it. It was a shot down the gallery of the plaza of the San Juan Bautista Mission near San Jose, California.
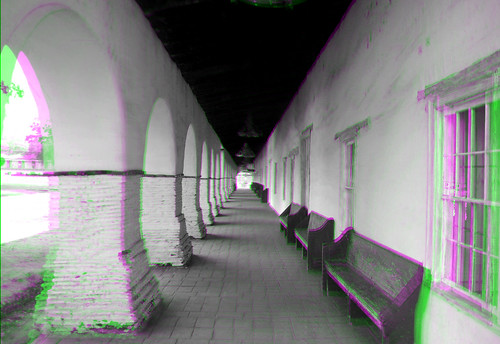
This process tends to produce a very symmetrical anaglyph. The focal sweet spot is always going to be in the very center of the image.
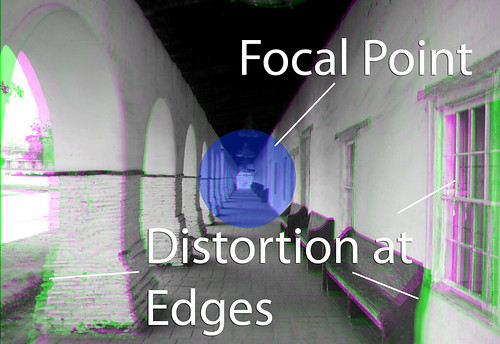
I may need to play with some of the other distortion capabilities in Photoshop to see if I can offset the focal point a bit. I guess I could crop the image differently, but that might throw off some of the distortion at the edges of the photo. I could also do some further warping of the image once the anaglyph is finished. Obviously, there’s still lots of room for experimentation.
So far I’ve really only played with magenta-green because those are the glasses I have. My cheapo Hannah Montana special cyan-red glasses still haven’t arrived. When they do, I may start playing around with that color scheme. Until then, however, I think it’s time to give my tired, crossed eyes a rest.