The folks over at the Google Earth Design blog have been running a series on creating Google Earth tours. They have had some excellent suggestions for creating effective tours. (Part 1, Part 2). It was enough to get me to try creating a tour or two.
For some reason I haven’t done much with GE Tours. To me they seem passive in a constructivist classroom. If I’m doing a presentation, I prefer to use a series of placemarks that I access as needed, rather than a fixed tour. In fact, the GE Design Blog states the following:
If changes of scale and location are not important your narrative it is quicker and just as effective to use presentation software such as PowerPoint.
However, their blog posts inspired me to at least give it a shot. I won’t repeat all of their suggestions, but here are a few things I learned…
First, eliminate the clutter. When I’m working with students and teachers this is the first thing I tell them. Turn off any layer that isn’t essential to your tour. This will also make your tour run more smoothly, especially if you have an older, slower machine.
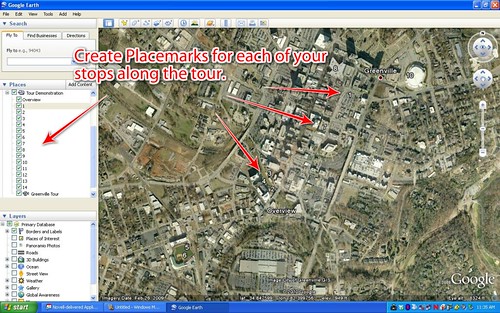
A tour will remember every stop and every movement you make while recording. You could do it free-hand, but it’s better if you have it planned and set ahead of time. Create a folder, then create placemarks for each of the locations you want to visit on your tour in that folder.
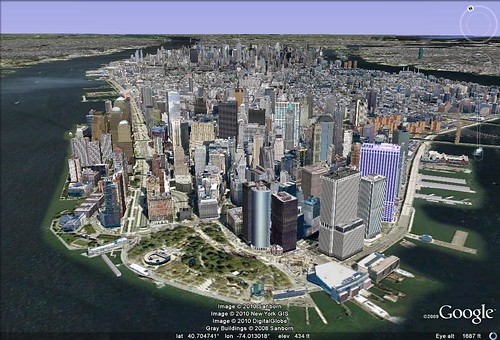
If you create all of your placemarks as straight overhead, north-at-the-top-of-the-map locations, your tour will get very boring very quickly. Take advantage of the 3D capabilities of Google Earth and create tours that zoom around landforms and architectural landmarks. Placemarks remember orientation and view angle, so it’s possible to get multiple views of the same location. In fact, it may be better to think of these as “views” rather than “placemarks.”
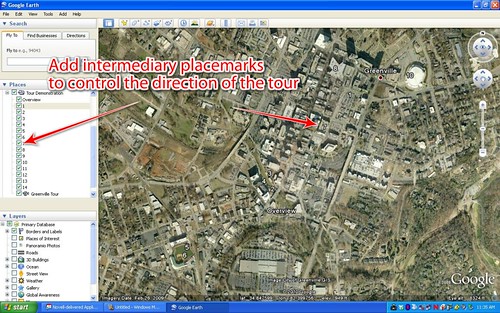
One of the big things that GE Design Blog discusses is how to move from one location to another in a way that doesn’t confuse your viewers. For global movement, keep north to the top of the screen. More importantly, though, Google Earth picks its own route from point A to point B, and this might not be the best from a presentations standpoint. Intermediary placemarks that are visited briefly in route will keep the tour on track.
For my tour I decided to visit a few points around Greenville, South Carolina. I first turned on the 3D buildings, then decided what views I wanted to incorporate. I set a placemark for each of these, then did a run-through of the tour. If I didn’t like the way GE moved from one point to another, I would set an intermediary placemark to force a particular path.
When it comes time to record the tour, remember to TURN OFF THE TOUR LABELS! In the images above I have them checked. However, if you’ve got long placemark names, they may just get in the way. You can visit the placemark without activating the label.
Click on the placemarks to visit your sites in order while the tour is recording. Linger only as long as necessary at each location. Your viewers will get bored if they sit in one place too long. Don’t stop at the intermediary places – just click on them to deflect your path as necessary, then move on to the next placemark.
Google Earth gives you the ability to record narration along with your tours. If you intend to use this only with Google Earth, that’s fine. However, if you plan to do a video screen capture, you may want to just practice the narration as you go along, but add it later when you create your video. This will give you the option of adding music, title screens, etc.
So, here’s my final product – a brief tour of Greenville. I’ve used the 3D views along with a couple of overhead views. I start with long view to establish the city’s location in Upstate South Carolina, then zoom in for the rest of the tour. It took a bit of time and effort, but I think the results turned out OK.


Hi Tom,
Nice work! Glad the post inspired you, btw, GoogleEarthDesign is just me, no other folks 🙂
I think your comment about screen clutter was well made, I always turn everything off until I want it but I forget that the default view in GE has all sorts of layers showing.
I’m not so sure I agree about the “If you create all of your placemarks as straight overhead, north-at-the-top-of-the-map locations, your tour will get very boring very quickly” idea, yes, you should use the 3D capabilities of GE when you can e.g. when looking at interesting topography (or 3D bulidings as you have done) tilt the view but apart from that, straight down views with north upwards are easiest to understand for users when moving around. I’ve read reports of viewers feeling seasick because of complex camera paths.
Hope you find the last instalment of interest
Best
Rich
Rich,
Thanks for the feedback. It’s been a great series, and I’m looking forward to Part 3.
I actually meant to include a bit about the complex camera paths you mentioned and inducing motion sickness in your viewers. I guess my point was that you should put some effort into selection of placemark, angles, and views so that they engage your viewer. A little judicious motion can help (think Ken Burns.)
Fascinating stuff. I tend to use the Street Views feature to do ground level tours as well. I wonder if there is a way to cause the street view images to stream one into another along a predetermined path through a city. If one really was fancy (I doubt current software would do this), a split screen with ground level on one side and bird’s eye on the other side would be cool to let people see immediate and the macro views. Way above my pay grade. 🙂