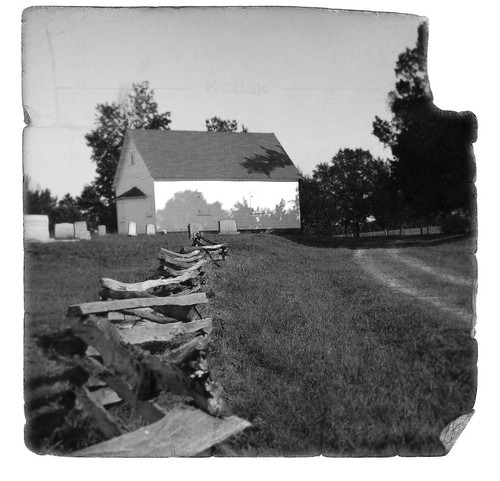
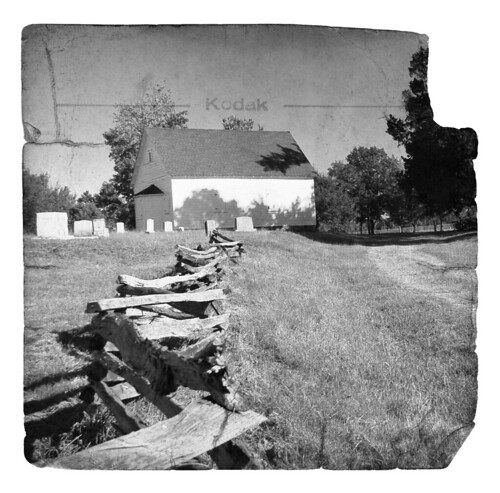
…or…
versus
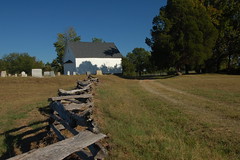
So, here was the challenge – could a technically intricate image created in Photoshop (top image) be replicated using the Aviary.com suite of tools (bottom image)?Both images use the same base images. First, there is one of the photographs I took of Shiloh Methodist Church.
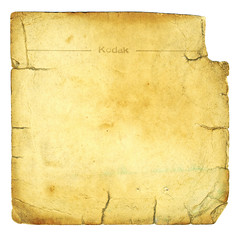
Also used was this texture created by Flickr photographer Alex Poulin.
Photoshop
I opened both images in Photoshop. I resized the texture to be the same height as the church image, then copied it onto a layer on the church image. I reduced the opacity of the texture layer so that I could see the church layer below through it. I was then able to position the texture layer so it would frame the church like I wanted. I then cropped the whole image to match the texture’s aspect ratio.
I duplicated the church layer. On the second church layer I applied a strong lens blur. I then added a mask with a radial gradient coming from the middle. This replicated the blurry edges of an old lens, with the sharper sections in the middle of the image.
I then duplicated the texture layer. There are several cracks and folds in the texture that I didn’t want to get lost as an overlay. Also, I wanted the edges to the texture to come through.
The first texture layer was set as an overlay. The texture layers had a white border. However, just as an overlay, the church image bled through onto the white bits. On the upper texture layer I applied a mask that kept the white of the upper texture layer, and expanded it a bit so that the edges of the texture came through. I then used the brush tool on the mask to bring out the folds and a couple of the larger cracks.
I wasn’t happy with the way the colors looked. On each layer I applied a monochromatic channel mixer mask, tweaking each one to bring out the shades of gray I wanted. I then flattened the entire image and saved it.
Aviary.com
The trick was to find analogs in the Aviary world that would do the same thing. Using the Phoenix image editor module, the first problem I encountered was in trying to line up the layers so I could crop them properly. I couldn’t find any way to reduce the opacity of the texture layer so that I could line them up like I would like. I’ve since learned that the Alpha setting on the upper channel may have done the trick, but it wasn’t apparent. I kind of had to line it up and guess.
The second problem was in creating the lens blur effect. The blur filter in Phoenix didn’t do what I wanted, so I tried the Peacock effects editor to see if it had something I could use. I never could replicate the effect, so I gave up on it.
In general, I had lots of problems with masking. I couldn’t edit the mask like I wanted to bring out the edges of the textures and the cracks. Ultimately, I only used two layers. I set the upper texture layer as an overlay. Since I couldn’t get the masks to do what I wanted, I just selected the white borders of the texture layer, switched to the church layer, then deleted that selection, leaving the white border.
I didn’t have a way to use a channel mixer to change the image to black and white. Instead, I used a simple desaturation on both layers. That gave me the final image.
I was a bit frustrated that I couldn’t find some of the same tools or effects in Phoenix and Peacock. They may be there, and I just don’t know where to find them. As far as the images themselves, the jury is still out. Was all the effort worth it for the Photoshop image? Or was the simple editing of the free Aviary.com able to create just as good an image? I’m not sure I can even answer that one.


I’m sure that aviary.com has a useful purpose for basic image manipulation, but Gimp still wins for free photo editing. Yeah, it has a learning curve, but that is to be expected for a free product.
I am so spoiled with Adobe Creative Suite 5! But if I had to, I’d use Gimp.
Not going to argue with you there. I just haven’t used Gimp much lately since I have Photoshop. However, Aviary is included with Google Apps for Educators, which we’ve been promoting in our district.