SHREK: For your information, there’s a lot more to ogres than people think.
DONKEY: Example?
SHREK: Example? Okay. Uh… ogres are like onions.
DONKEY: They stink?
SHREK: Yes. No!
DONKEY: Oh, they make you cry?
SHREK: No!
DONKEY: Oh, you leave them out in the sun, they get all brown and start sprouting little white hairs.
SHREK: No! Layers! Onions have layers. Ogres have layers. Onions have layers. You get it? We both have layers.
DONKEY: Oh… you both have layers… You know, not everybody like onions. Cakes! Everybody likes cakes. Cakes have layers.
SHREK: I don’t care what everyone likes. Ogres are not like cakes… You dunce, irritating, miniature beast of burden. Ogres are like onions. End of story. Bye bye. See ya later…
OK, you may be wondering what Shrek has to do with photography. Actually, it’s more about layers – specifically, layers in Photoshop.
I had been working with layers ever since my friend Duck Hunter showed me the technique. The process can add interest, texture, and even change the mood of a photograph. The process is simple enough…
1. Open a photograph in Photoshop or your image editor of choice.

2. Find an interesting texture, such as the ever-popular “Pollution” texture from Jerry Jones, , AKA Ghostbones, AKA SkeletalMess
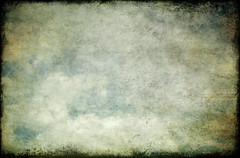
3. Resize the texture to match the base photograph, then copy it into a layer on top of the base. Change the blend mode of the texture layer from “normal” to “overlay”…
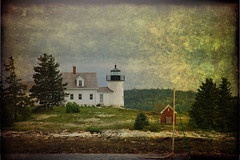
…and the result is an image that combines aspects of both layers. You can change the opacity of the upper texture layer to increase or decrease the effect.
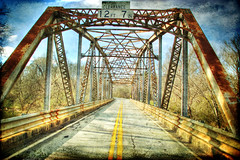
Just like HDR, tilt-shift, Lomo, Orten, or any of the other currently popular techniques, it’s very easy to overuse texture. Take, for example, the photo below:
In my opinion the crackled mud texture detracts from the original photograph. You can experiment with blend modes and opacity levels, but that affects the whole photograph. Sometimes you want heavy texture in part of the photography, and less in another. One solution I came up with was to use creative masking to allow parts of the image to be textured, while other parts were clear.
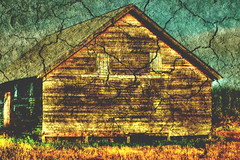
However, even this technique didn’t seem ideal. If I used just the base image and one texture overlay, sometimes details of one or the other would get lost. For example, if you are using a texture with a heavy vignette or frame component, you want that to come through. If you set your blend mode for that layer in Photoshop to “overlay”, then it might get lost.
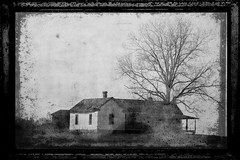
The photo below has a strong frame element to the texture, and I wanted that to come through. To create this image I used three layers. The first layer was the black and white image of the old house. The second layer was my texture set to an overlay blend mode, and the third layer was a copy of the texture with a normal blend mode, but with everything except the frame either deleted or masked out so that the layers below came through.
I found myself adding more texture layers and using more masking to achieve the effect I wanted. However, I had no clue how far one could take this process until I stumbled onto two tutorials by SkeletalMess.
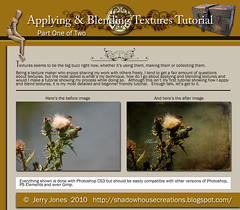
In the first tutorial, Jerry uses no less than five different textures with different blend modes and opacity settings. More importantly, he uses multiple copies of the original base layer, also with different blend modes and opacity settings. This eliminates the need for extensive masking to make sure your original image comes through, and it creates a much richer image.
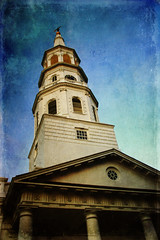
Using the same textures and settings as Jerry did for his tutorial, I took this throw-away, underexposed base image of St. Michaels in Charleston…
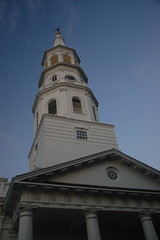
…and turned it into this image…
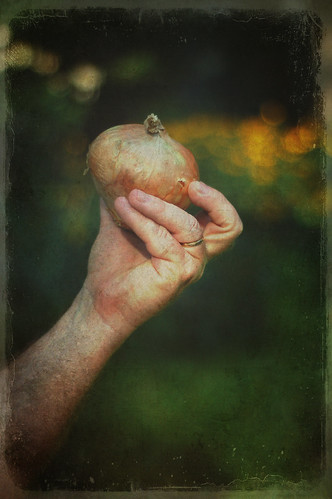
The onion photograph at the top of this post was done using this same tutorial. Here are the layers I used for it:
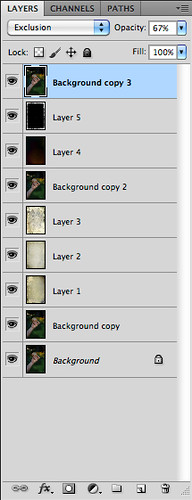
The one thing I did was to make an additional copy of the background layer and add it to the top with an exclusion blend mode and opacity of 67% just so that the base came through a bit more.
In the second tutorial I found, Jerry uses what he calls his “painterly effect.” The completed image looks like it was done on canvas, as if it were a painting. This tutorial uses only two layers, but also makes use of the “Texturizer” filter in Photoshop.
Using this process I took this image of an iron fence in Springwood Cemetery…
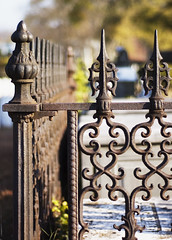
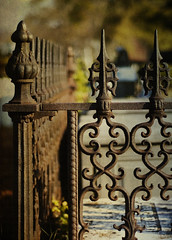
…and turned it into the one below. You will need to click on the image to view it larger so that you can actually see the texture.
As I stated previously, textures can be overdone. I don’t use this with all of my photographs, but it is a good way to try to resurrect a photo that already has problems. Don’t be afraid to experiment with blend modes, and don’t be afraid to combine different types of layers.