As I was doing the research for my post on South Carolina’s Tricentennial, one point was driven home – you just can’t find everything you need on the Internet. That’s a lesson our students often forget. Sometimes you just have to crack open a book or make a trip to the local library in order to get the information you need.
I have, however, found a couple of tricks to make library research much easier, especially if you’re working with reference materials and other items that have limited circulation, or that can’t be removed from the library. I’ve found these techniques especially helpful in places like the South Carolina Room of the Greenville County Library, where the items are often one of a kind, and need to be protected.
I always have an old-fashioned pencil and paper for taking notes, but my research tool of choice lately has been my trusty Nikon S70 point and shoot camera. Today’s cameras have such high resolution and memory is so cheap that it’s just as easy to snap a picture of a page in a book to review later. You can zoom into the photo to read the text clearly, and it saves a ton of money on photocopying. You can also snap photos of images and illustrations, as well as bibliographical information for proper citation later.
You can use any decent small camera, including phone cameras. However, with the current state of technology, I’ve found small digital cameras to be a bit better than camera phones, but that technology is rapidly changing with smart phones. You just need easy access to the photos later, and to me it’s a bit easier to copy from an SD drive than to upload the photos from a phone to a service.
Having photos of the pages to review later is in and of itself a huge boon, but you can do even more once you have the images. Google Docs now has OCR capabilities built in. It can scan PDF and image files for text, then render that text as part of your document. You can then edit and copy the text as needed, inserting it as quotations, or using it however you might like.
Google Docs does have a 1 MB limit on the file size for OCR upload, and most modern cameras exceed that limit with their current default settings. You will probably have to resize the image to upload. You might also want to adjust the exposure and contrast to bring the text out a bit. If you know you are going to be using the photos for OCR work, here are a few suggestions:
- Set your camera’s image resolution so that it takes images that are under 1 MB. (Remember to set it back when you want to do regular photography
- Make sure that your camera catches the text without distortion. Holding the camera at a slight angle to the text might cause problems with OCR.
- Try to get the best contrast between the text and the background that you can.
- Understand that the process is not perfect, and that you will probably still have to do massive re-editing and formatting once the text is captured.
Bearing those things in mind, here’s how it works. In this case I used my HTC Droid phone to capture an image from a magazine:
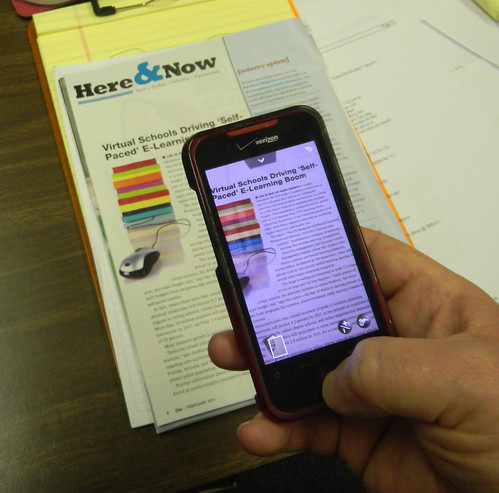
I uploaded the photo to my Dropbox so it would sync to my laptop, and I could open it easier.
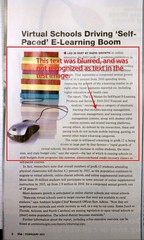
Since I held my phone at a slight angle I got some distortion in the photo. I could have retaken the photo, but I left it in for purposes of this demonstration. Text at the top of the image was a bit blurred…
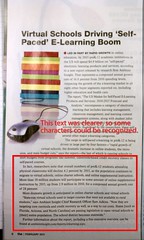
However, text toward the bottom was clearer…
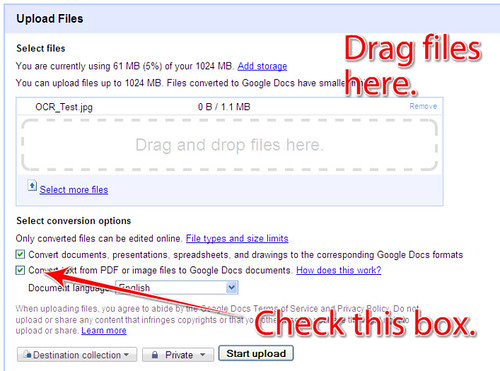
Go to your Google Docs account and select Upload a File. You will get a screen where you can either select a file from your computer with a dialog box, or you can drag and drop files. Make sure that you have checked the box next to “Convert text from PDF or image files to Google Docs documents” then click the Start Upload button.
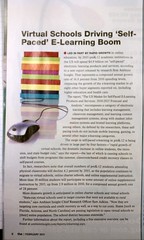
Google Docs will paste original photograph into the document, then put any text it is able to recognize down below it. This is what you see at the top of the document…

…and this is what comes after…
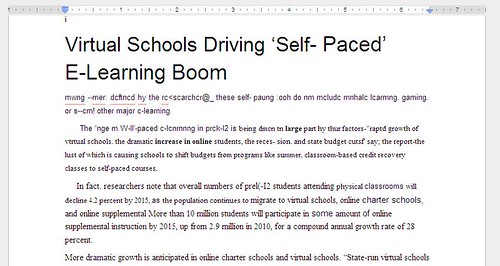
You will want to click the images to view them larger. You can definitely see that the converted text is not error-free. Also notice that the text starts where it’s most legible. Almost all of the text from the blurred area was excluded, and the document starts where it was able to recognize text (albeit, with lots of errors.) Even so, if you can get a decent image of the page in fairly sharp focus, it will probably take less time to do some simple correcting than to retype the page into your notes.
One very cool thing I noticed was that orientation is not important. Even if the image is rotated 90 degrees, Google Docs can still do OCR on the image. Sometimes when you’re holding a camera horizontally over a page on the desk, the camera can’t figure out whether it should be landscape or portrait. You could, of course, hold the page vertically and snap a picture to insure the proper orientation, but that might cause distortions in the text if you don’t do it just right.
In addition to Google Docs, there are several other online OCR programs available. I tried out a couple of them, and this is what I found…
- onlineocr.net – I got kind of mad at this one. It makes use of the word “free” in a manner of which I don’t approve. It’s free to sign up for an account, and you get 20 credits free, but if you want more you have to pay. It costs about 1 credit per page/image. I didn’t test it for quality, etc.
- www.free-ocr.com – This one is very basic. You can upload an image, and you get a text box with the results which then can be copied into another document. It is free, and there are no accounts. However, they do limit you to 15 images per day so as to keep server load down. I uploaded the text image from above, and the results were terrible. It would have been easier to retype it. However, you might get better results with a clearer image.
- www.free-online-ocr.com – This is similar to the second one on the list. Instead of just placing the extracted text into a text box for copying, this service will generate a DOC, PDF, RTF, or TXT file which can be downloaded. I uploaded a 1.25 MB image file, and the DOC file it generated was 15 MB for download – not good. The results were pretty bad, as well – one page with a weird combination of text and bits of the original image. Again, I don’t know how a clearer image might fare.
But what about smart phones…?
As I mentioned above, I like my little Nikon better than my smart phone for this purpose because 1) the images tend to be a bit sharper, and 2) I find it easier to get the images into a format I can use without having to upload the image to a service, download it, then re-upload to Google Docs. Now, if my phone would upload images straight to Google Docs for OCR, that would be an entirely different story, but we’re not there yet.
Even so, the technology is quickly catching up. Evernote, Catch.com, and Springpad are excellent note-taking apps for the Droid and iPhone. Each of these employs some form of OCR for recognizing logos and for tagging notes. However, you can’t extract OCR text from an uploaded image. Likewise, Google Goggles does some amazing things with OCR on the Droid, including the ability to translate limited text. However, you can’t take the text and re-use it as you might need in a research project.
There are a several OCR apps available for the Droid. I tried out a couple of them. Droid Scan advertises itself as a “document scanner.” However, it does no OCR whatsoever. It only allows users to adjust image files with text so that the text is legible. Even though it advertises that it can create PDF files, those files just contain the adjusted images, and no true text.
I also tried mOCRa. I could import an image from my phone’s gallery for OCR. The app then contacts a remote server to do the processing, so the image file is actually uploaded, then the text is downloaded and displayed. The processing doesn’t happen on the phone itself. Using the same test image I’ve tried with the other products above, the results were pretty bad, with little or not recognizable text. Again, a clearer image might work better.
I’m not familiar enough with what’s available for iPhone, but there may be something out there that does better OCR on it. Prizmo seems to be getting good reviews, and I’m sure there are others available. I just don’t have an iPhone to check it out.
Fortunately, the human brain can process text and images much, much better than OCR software. If you just want to capture a note for quick perusal later, either a camera or a phone will do just fine, and lack of clarity can be forgiven. However, if you want to re-use the text without having to re-type it, you have to take a little more care and effort. Regardless, if I’m heading into a library to do research, in addition to my low-tech paper and pencil, I’ll always have some type of digital camera with me.
🙂
I use Evernote for just what you’ve outlined here.
I’m also one who likes to take hand written notes at conferences and workshops. There’s just something about pen and paper that helps me remember better than typing it out on the laptop. Once I take my notes, however, I snap a pic with the Evernote app and throw the paper away!
Evernote is a good product for that. I haven’t sprung for subscription version, yet.
I’m just the opposite when it comes to taking notes, though. I can type very quickly, so I find that I can pay closer attention to a speaker, or to a meeting in progress and type away without looking at my fingers. I’ve always got my little netbook with me.
What does “OCR” stand for? (I’m guessing the C is for “capture.”
And what’s a ‘drop box?’ Is it a Google feature?
I’ve been trying to take photos of old engravings out of books and have had a lot of trouble with my “wide angle lens” (the only lens on the camera but it’s fairly wide). If I get as close as I want to (for resolution) I get distortion from the lens. I’m hoping to be able to take photos good enough to frame this way but I need to keep playing around.
OCR = Optical Character Recognition
Dropbox is a service that let’s you share files over multiple computers.
That fancy new camera of yours may have a copy setting that might work for those plates.
@Dwight
This comment is a little late, but if your camera has lens interchangeablity, you possibly can get a reversing ring to attach like a filter and then mount the lens backwards on the camera. This gives a good flat field focus, and is used in some macro photography setups, especially with greater than 1:1 magnifications.
In blatant violation of district rules, I let my kids take pictures of notes from the board or overhead.