In my last post I talked about discovering that the South Carolina Digital Library has a new collection of 3D images. They have taken old stereographs from the Civil War era and have converted them to anaglyphs so that they can be viewed using 3D glasses. As I was thinking about how they did this, I found myself playing the part of Jeremy Clarkson and wondering, “How hard can it be?” Turns out, it’s not very hard at all. If you’ve got some basic Photoshop skills, creating anaglyphs is as easy as adjusting colors on different layers.
I figured it might be wise to start with a non-anaglyphic stereoscopic image and see if I could turn it into an anaglyph. One the best sources for this are the old historic stereographs like the ones in the SC Digital Library’s collection. Unfortunately, those are not in a format that’s easily downloaded. Besides, USC has already converted all of those into anaglyphs.
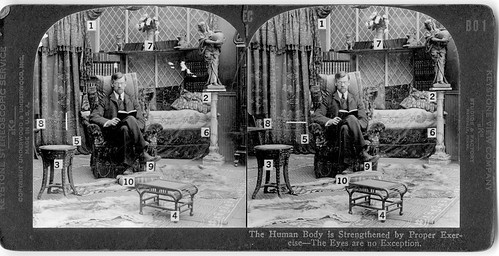
A quick Google image search found what I needed. This image even had reference points showing which parts would show up in 3D…
The next step was to figure out how to apply the coloration in Photoshop. I found this excellent tutorial from the “other” USC, and adapted it to my needs.
I cut the image in half along the dividing line, and pasted each half as a layer in Photoshop, with the right eye on top and the left below. I then changed the opacity of the upper layer so that I could adjust the position.
As you move the layers on top of each other to align them it becomes apparent that there is a focal point where everything seems to comes together. Usually this is in the middle of the image, but not always. The parts of the image away from the focal area will not align, but that’s OK – it’s part of the effect. Here’s how the Southern California tutorial illustrates it:

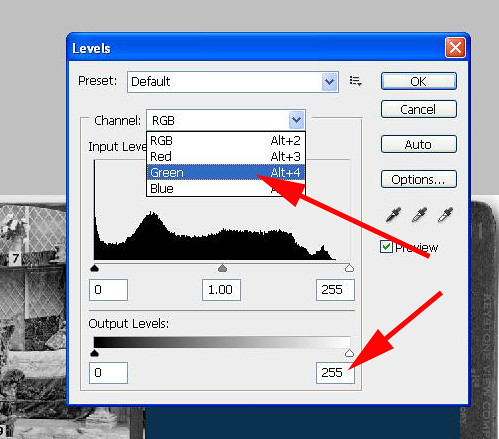
With the images aligned, it’s time to apply the coloration. First, change the opacity of the upper layer back to 100%. Since I had magenta-green glasses, those were the colors I needed. With the right eye layer selected, I went to Image, Adjustment, Levels and brought up the Levels menu. I selected the Green channel, and changed the upper Output Level from 255 to zero. This the left blue and red channels, which combined to give me my magenta layer.
I then selected the lower layer, the left eye layer, and adjusted its levels so that the red and blue channels were zero, leaving green.
The final step is to set the blend mode of the upper layer. This should be set to “Screen” so that the green and magenta are visible.

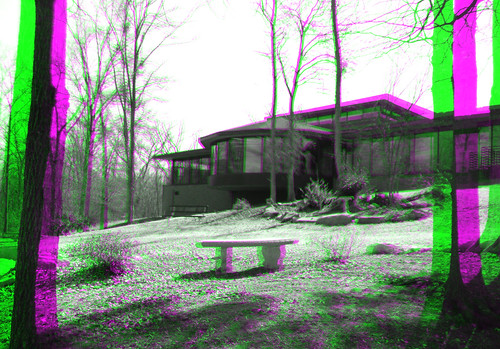
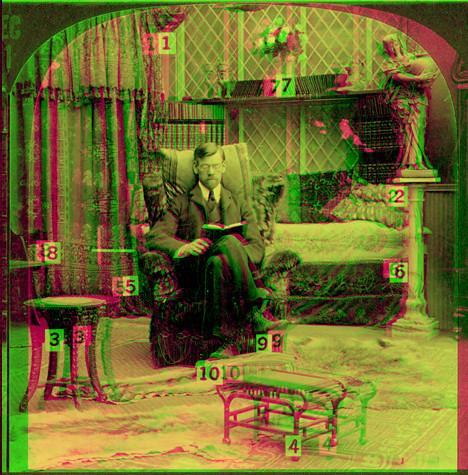
At this point your anaglyph is done. You could just as easily create a cyan-red image. For the left eye set the green and blue channel levels to zero, and for the right eye set the red channel to zero. You will probably want to crop the image so that it only has what you want, then save it as a separate file. Here’s my final result:
So that’s the process in Photoshop. There are plenty of old stereographic images out there with which to practice. If you want to create your own images, there’s another great tutorial at this site.
In Part 3 of this series I’ll talk about how to take your own photographs that can be converted to anaglyphs, and in Part 4 I’ll show you how to create fake anaglyphs from existing photographs in Photoshop.