It may seem a bit ironic. Flickr and the web are full of schemes that make photographs taken with high-end cameras look like they were taken with cheap odd-balls – Lomographs, Holgas, Dianas, etc. Most of these techniques involve manipulating images with Photoshop to mimic a particular photographic effect. Today I tried one that involves the construction of a lens – one with a pinhole.
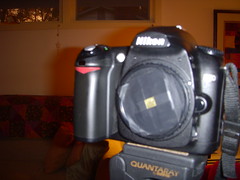
The concept is quite simple. Taking the black body cap from any SLR, be it digital or otherwise, you can add a pinhole aperture. Of course, you have to put the camera in full manual mode, but it works. Here’s how I did it…
Construction:
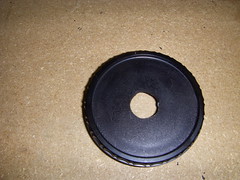
First, you need a spare body cap. I found one for my Nikon at Wolf Camera for $3.99, but I bet you can get them cheaper. In the middle of the body cap I drilled a 1/2 inch hole. That’s far too big for a pinhole – other material will cover this.
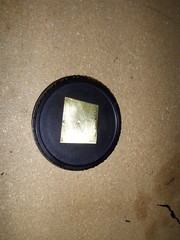
Next I cut a 1 inch square piece of brass shimming. Normally you can find this at auto parts stores, but I found mine at an old-fashioned hardware store – not one of those big box places. Ideally you should use a number 8 needle, but I grabbed what was available from Laura’s sewing kit. I pressed and twisted the needle into the brass until I saw a pimple on the other side. I then sanded the other side with fine sandpaper until it was flat, then started pressing the needle in from that side. I continued to work back and forth like this until I could just barely make out a hole in the material. This back and forth process insures that you have a very round aperture with no burs for distortion.

About the time I finished this, it occurred to me that I had done all this sanding and everything in a very dusty environment, and this thing was going to be right next to my image sensor. I took great pains to clean the body cap thoroughly when I was finished.
Shooting:
I used to teach pinhole photography to my seventh graders. We designed cameras in all shapes and sizes – some telephoto, some wide-angle, and some just plain bizarre. I would make them do the calculations for f-stop and exposure time. Now there are online calculators to make that task easier. If I were still shooting film, I would go through the trouble. However, with digital, I decided to just shoot, see if it looked OK, make adjustments, then shoot again.
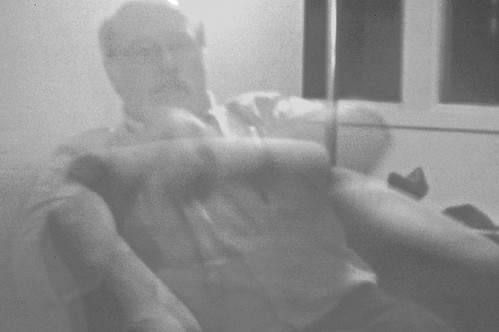
My first test was in our living room with every light turned on. My test shots made it look like I would need either a 30 second exposure or bulb. I did a couple of self-portraits where I moved out of the shot about half-way through, leaving a ghostly image. Even at 200 ISO things weren’t too clear. I decided that black and white was the way to go with these shots.
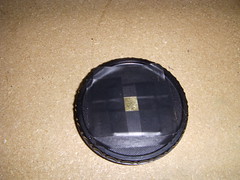
I wasn’t thrilled with the results so far. I was hoping for fantastic sharpness and depth of field from the tiny aperture. Didn’t happen. Apparently I had the aperture too large for my focal length, so I cut another piece of brass and made a smaller aperture.
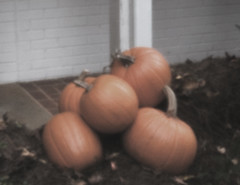
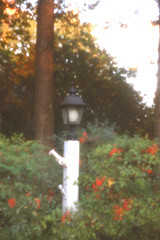
I did a few outdoors shots this afternoon with the new aperture. Unfortunately, the sun was already starting to set, so lighting conditions still weren’t grand.

In that last shot, I set the exposure for 30 seconds, moving about half-way through the shot to create the “ghostly twins.” In all of these, the images were underexposed, even at 30 seconds. I played around with them in Photoshop to adjust exposure, etc.
Hazards:
In the “twins” shot notice the large speck of dust right in the middle of the image. If you’ll look, that wasn’t in my earlier exposures. This pinhole method can expose your image sensor to dust. I doubt that much will get through the aperture, but dust might collect on the body cap itself. When not in use, I would store the cap in a zip-top bag or something, and try to keep it as dust-free as possible. The tiny aperture of the pinhole lens really points out any problems with dust or dirt on the sensor. Fortunately, I was able to blow this speck off the sensor.
Conclusions:
As an experiment, this has been pretty cool. I would like to take this to a crowded area and see what happens when everyone moves out of the shot. However, from a practical standpoint, the potential for damage from dust on your image sensor really outweighs the coolness of being able to do this. The images aren’t all that great, and the effects can easily be replicated in Photoshop. Again, it’s another way of making an expensive camera take crummy pictures, and I can already do that quite well, thank you.
[tags]pinhole camera. pinhole, camera, DSLR, photography[/tags]